카드 및 미리보기 이펙트 설정
기본 화면에서 카드를 확인할 수 있도록 하였고, script를 통해 이펙트를 설정하였다.
1. 카드 생성
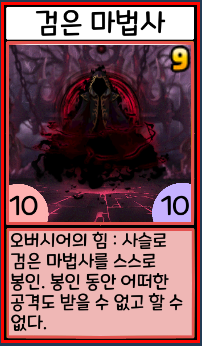
앞의 post에서 카드를 생성할 item을 미리 만들어 두었다. 이 item을 바탕으로 Image의 형식의 카드를 생성한다.
카드는 Prefebs를 통해 UI에서도 잘 작동하도록 image 오브젝트로 생성하였다.
< 카드 기본 디자인 >
item을 통해 카드 세팅
    public void Setup(Item item, bool isFront)
    {
        this.item =item;
        this.isFront = isFront;
        if(this.isFront)
        {
            card.sprite = null;
            if(item.code.ToString().Substring(0,1)=="2" && int.Parse(item.code.ToString().Substring(3,3))<29)
            {
                Img_main.sprite = img_null;
            }
            else
            {
                Img_main.sprite = this.item.main;
            }
            TMP_name.text =this.item.name;
            if(item.code.ToString().Substring(0,1) == "2")
            {
                TMP_ATT.text ="";
                TMP_DEF.text="";
            }
            else
            {
                TMP_ATT.text = this.item.attack.ToString();
                TMP_DEF.text = this.item.health.ToString();
            }
            TMP_ABL.text = this.item.abl;
            Img_cost.sprite = this.item.cost;
            Img_cardbase.sprite=this.item.cardbase;
            Img_background.sprite=this.item.background;
            ablcode = this.item.ablcode;
        }
    }
아래는 미리 만들어 두었던 item list를 토대로 카드 오브젝트를 생성한다. 위치는 scroll view content에 위치한다.
    public void AddCardOnMainDeckSetting()
    {
        for(int i=0;i<mainDeckContent.transform.childCount;i++) //deck을 편집할 시에 모든 카드 오브젝트를 삭제하고 다시 생성된다.
        {
            Destroy(mainDeckContent.transform.GetChild(i).gameObject);
        }
        LoadMyDeck(); // 앞의 POST에서 만들어 두었던 함수로 내 DECK에 대한 List<Item> 생성한다.
        foreach (var item in deckitemBuffer)
        {
            var cardObject = Instantiate(cardPrefeb,Vector2.zero,mainDeckContent.transform.rotation); // 오브젝트 생성
            cardObject.transform.parent = mainDeckContent.gameObject.transform; // 오브젝트의 parent를 메인화면에 덱을 볼 수 있는 scroll view에 위치한다.
            cardObject.transform.Translate(new Vector2(mainDeckContent.gameObject.transform.position.x+25,mainDeckContent.gameObject.transform.position.y));
            var card = cardObject.GetComponent<CardMain>();
            card.Setup(item,true); //그 뒤에 카드의 item을 세팅한다.
            cardObject.GetComponent<BoxCollider2D>().enabled = false; //움직일 수 없게 collider를 꺼둔다.(뒤에 콜라이더 사용)
        }
    }
위와 같이 사용하면, scroll view content에 카드 이미지를 추가할 수 있다. 추가적인 script로 scroll view의 움직임을 제어할 수 있다.
public class PrettyScroll : MonoBehaviour
{
    public GameObject scrollbar;
    float scroll_pos = 0;
    float[] pos;

    // Update is called once per frame
    void Update()
    {
        pos = new float[transform.childCount];
        float distance = 1f / (pos.Length - 1f);
        for(int i=0;i<pos.Length;i++)
        {
            pos[i] = distance *i;
        }
        if(Input.GetMouseButton(0))
        {
            scroll_pos = scrollbar.GetComponent<Scrollbar>().value;
        }
        else
        {
            for (int i=0;i<pos.Length;i++)
            {
                if(scroll_pos<pos[i]+(distance/2)&&scroll_pos>pos[i]-(distance/2))
                {
                    scrollbar.GetComponent<Scrollbar>().value = Mathf.Lerp(scrollbar.GetComponent<Scrollbar>().value,pos[i],0.1f);
                }
            }
        }
        for(int i=0;i<pos.Length;i++)
        {
            if(scroll_pos<pos[i]+(distance/2)&&scroll_pos>pos[i]-(distance/2))
            {
                transform.GetChild(i).localScale = Vector2.Lerp(transform.GetChild(i).localScale, new Vector2(2.5f,2.5f),0.1f);
                for(int a = 0;a<pos.Length;a++)
                {
                    if(a!=i)
                    {
                        transform.GetChild(a).localScale = Vector2.Lerp(transform.GetChild(a).localScale, new Vector2(2f,2f),0.1f);
                    }
                }
            }
        }
    }
}
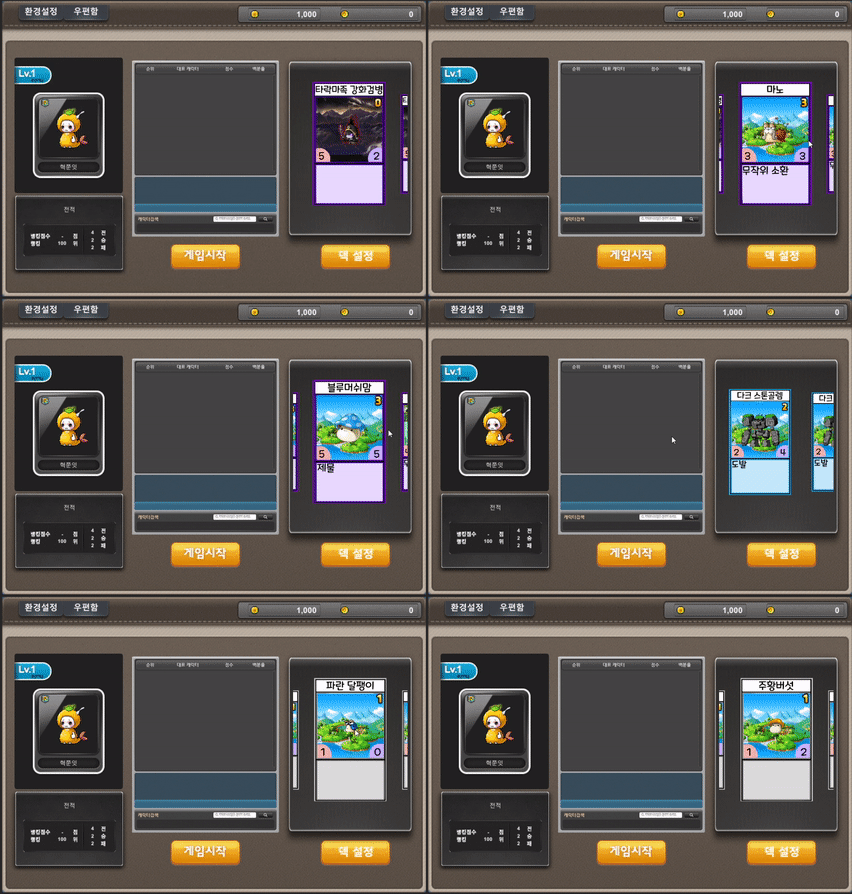
위와 같은 코드를 사용하면, scroll view에서 카드가 가운데로 왔을 때 멈추게 되고, 확대되어 보이게 된다.

< 결과물 >
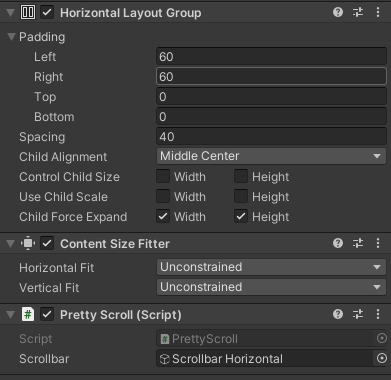
위의 카드가 움직이는 공간은 scroll view에서 scroll을 삭제한 것이고, content의 Inspector에 따로 Horizonral Layout Group과 Content Size Fitter을 추가한 것이다.
< Inspector >
content 안의 오브젝트들이 자동적으로 위치를 잡는다.

